
Downloading your Amazon Unified Transaction Report
SellerTally imports your Amazon sales, fees, and refunds from a report Amazon calls the Unified Transaction Report — you may also see it called the Date Range Report, since it’s requested by picking a date range in Seller Central. Either name points to the same CSV, covering one full calendar month, requested from Seller Central’s Reports Repository. This walks through exactly where to find it, one month at a time.
You’ll do this once for each month you want to bring into SellerTally. It takes about a minute of clicking plus however long Amazon takes to generate the file (usually well under a minute, occasionally a few minutes for a busy month).
Which layout am I on?
Amazon has been rolling out a redesigned Seller Central through August 2026. If your left-hand menu says Menu with a list of categories like Products, Orders, Finance — you’re on the new layout, covered first below. If your menu instead lists Catalog, Inventory, Pricing, Orders, Payments — you’re on the classic layout, covered right after.
Either way, there’s a New Seller Central toggle in the top-right corner of the page that tells you which one you’re on and lets you switch.
New Seller Central layout
-
Click the Menu icon in the top-left corner, then click Finance to expand it, then click Manage payments.
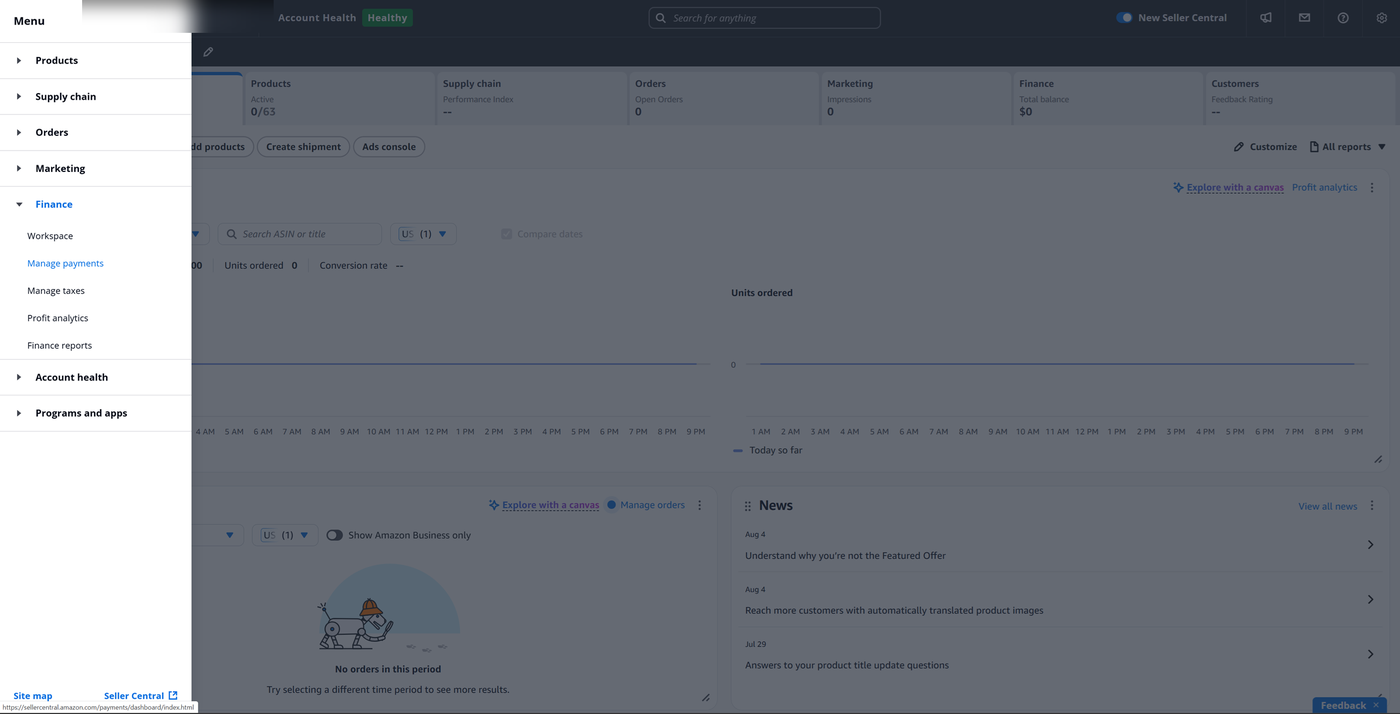
-
This opens the Payments Dashboard. Click the Reports Repository tab (it’s the last tab, marked “New”).
Once you’re on Reports Repository, skip down to Requesting the report — the rest of the page works identically regardless of which layout got you there.
Classic Seller Central layout
-
Click the Menu icon in the top-left corner, then click Payments to expand it, then click Reports Repository directly.
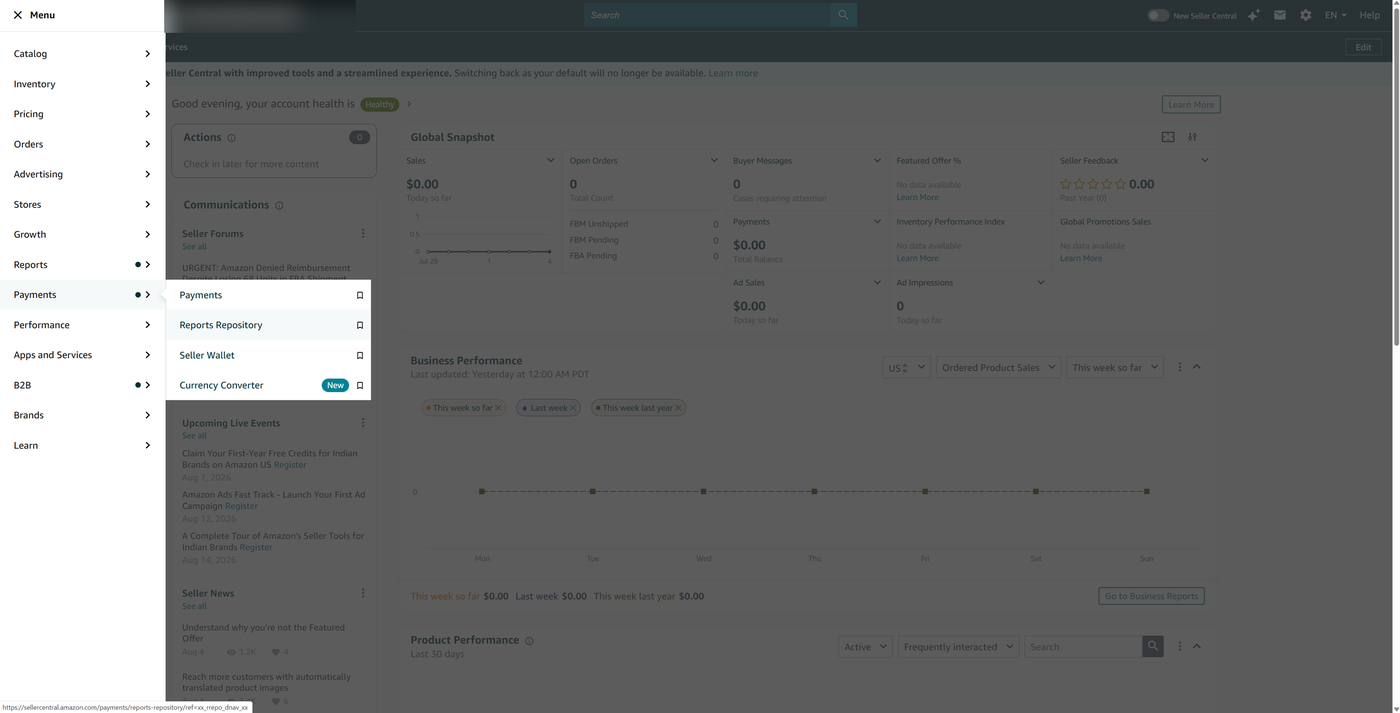
That’s it — one click fewer than the new layout, since Payments and Reports Repository are already next to each other in the classic menu. You’ll land on the same Reports Repository page described below.
Requesting the report
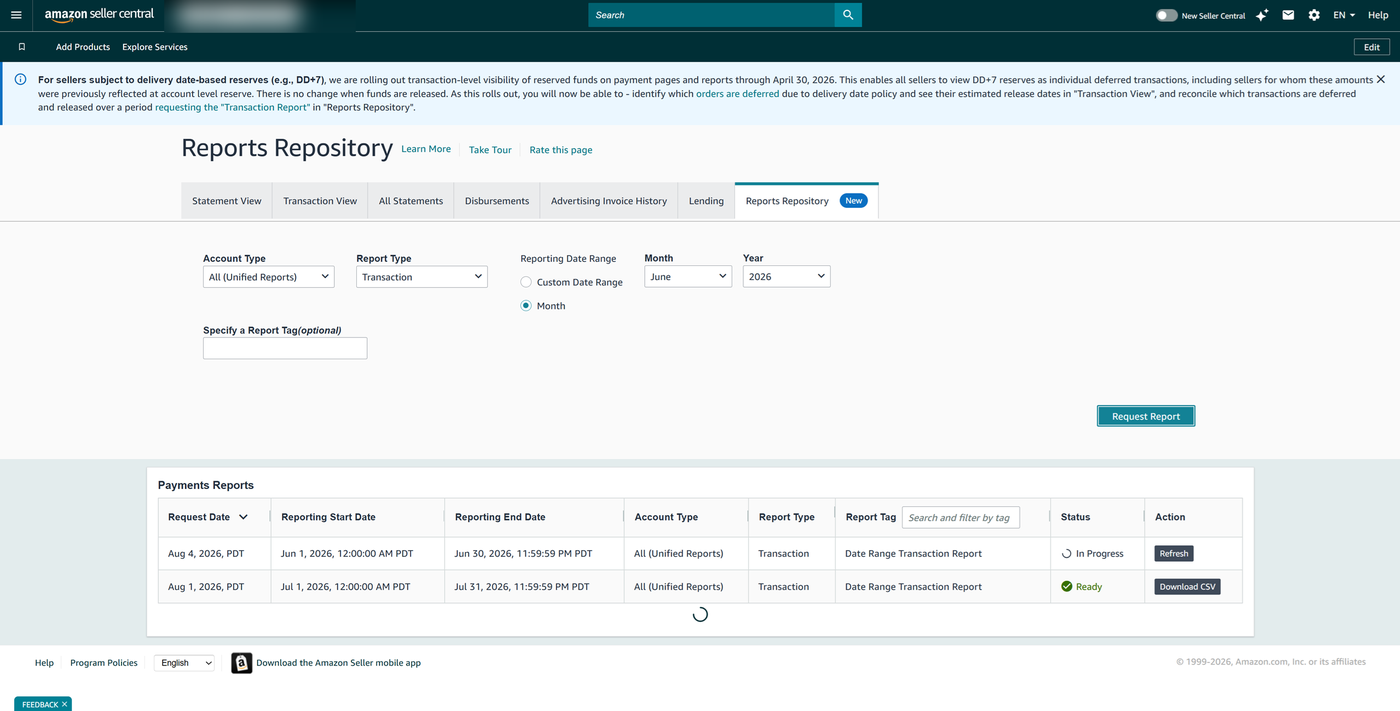
You’re now on the Reports Repository tab. Fill in the form exactly like this:
- Account Type: All (Unified Reports) — this is already selected by default.
- Report Type: click the dropdown and choose Transaction (not Summary, not Deferred Transaction — Transaction is the one SellerTally reads).
- Reporting Date Range: select the Month radio button (not Custom Date Range). Two new dropdowns appear — set Month and Year to the month you want to import.
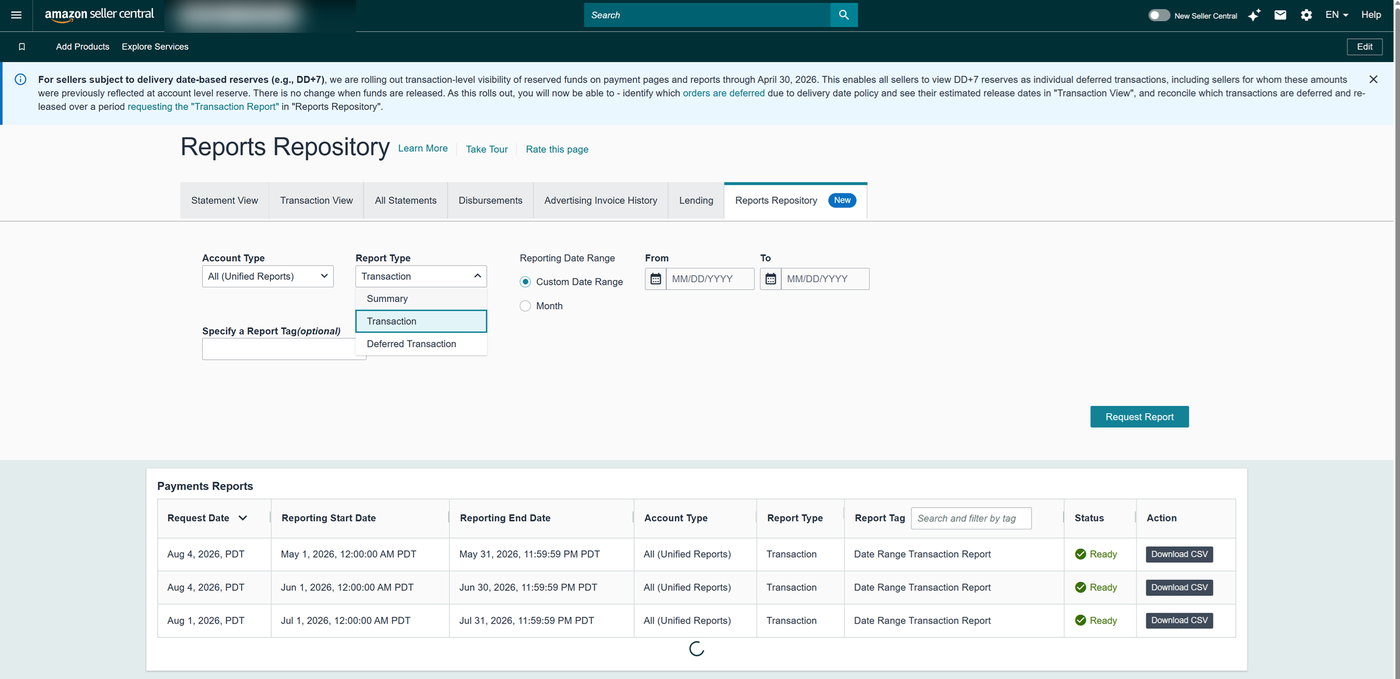
Leave Specify a Report Tag blank — it’s optional and SellerTally doesn’t need it. Then click Request Report.
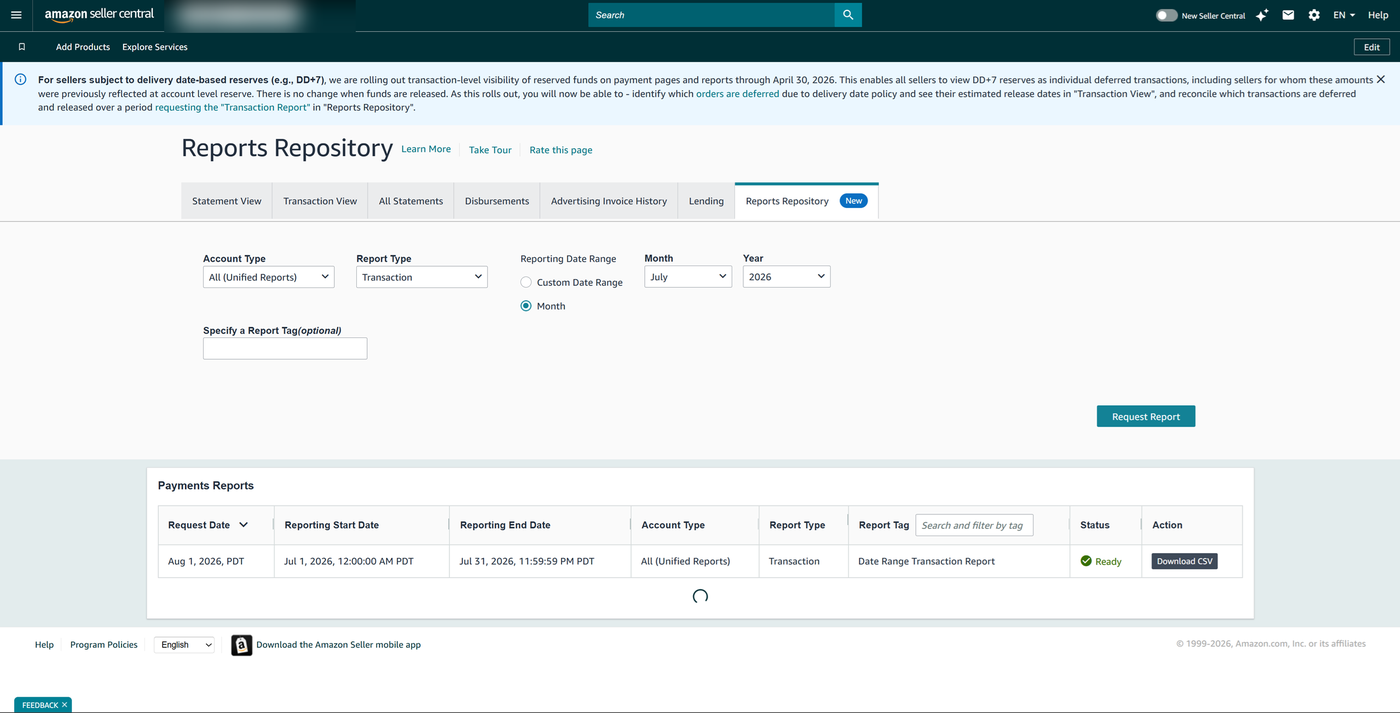
Downloading the file
Your request appears at the bottom of the page in the Payments Reports table with a status of In Progress. Amazon is generating the file — this is usually quick, but can take a few minutes for a busy month. Click Refresh (or just wait and reload the page) until the status changes to Ready, then click Download CSV.
The file lands in your browser’s default downloads folder, named something like 2026JulMonthlyUnifiedTransaction.csv — the year and month abbreviation followed by “MonthlyUnifiedTransaction.csv”. That’s the file to upload on SellerTally’s import screen.

Common gotchas
- Report Type must be Transaction. Summary and Deferred Transaction are real Amazon reports, but they don’t have the line-level detail SellerTally needs, and the import screen will reject them.
- Use the Month option, not Custom Date Range. SellerTally imports one calendar month at a time — picking a custom range that doesn’t line up with a full month (say, the 15th to the 15th) will produce a file the import screen can’t match to a period.
- If you’re on a very old report, some columns may be missing. Amazon added two new columns (transaction status and release date) to this report starting with data from January 2025 onward. SellerTally handles both cases automatically, so this only matters if you’re curious why an older file looks slightly different from a newer one — no action needed on your end.
- One file per month. If you need several months of history, repeat this process once per month rather than requesting one large custom range.
Uploading to SellerTally
Once you have the CSV, head to the import screen in SellerTally, pick the same month you requested, and upload the file. If you ever need to re-import a month — say, because you downloaded it before the month had fully closed out on Amazon’s side — SellerTally will ask you to confirm before overwriting what’s already there, so nothing is lost by mistake.